Difference between revisions of "Create an Account"
From DSC WebSA
(Created page with "==Create an Account== Click on "Add Account" To create an account, click on the '''Add Account''' button on the home page. ...") |
|||
| (9 intermediate revisions by one user not shown) | |||
| Line 1: | Line 1: | ||
| + | [[category:Tutorials]] | ||
| + | |||
==Create an Account== | ==Create an Account== | ||
| Line 25: | Line 27: | ||
The '''Account''' page will open and you will be able to fill in all the account information such as the account name, contact information, panel information and any additional comments that you wish to add. | The '''Account''' page will open and you will be able to fill in all the account information such as the account name, contact information, panel information and any additional comments that you wish to add. | ||
| + | |||
| + | |||
| + | |||
| + | |||
| + | |||
| + | |||
| + | |||
| + | |||
| + | |||
| + | |||
| + | |||
| + | |||
| + | ==Panel Details== | ||
| + | |||
| + | |||
| + | |||
| + | The Panel details section allows you to enter the necessary information regarding the alarm system such as: | ||
| + | |||
| + | *'''DLS Access Code''' : The DLS Access Code is always required in order to establish a connection with the alarm system. The DLS Access Code programmed by the installer in the alarm system must match the DLS Access Code typed here. | ||
| + | |||
| + | *'''Panel ID Code''' : The Panel ID Code is only required if you are having the alarm system establish the connection with the DLS Web SA software manually. To establish a connection via the alarm system keypad, press '''[*][6][Master Code][6]''' | ||
| + | ''Note: This feature must be enabled by the installer on the alarm system in order to manually establish the connection from the keypad.'' | ||
| + | |||
| + | |||
| + | |||
| + | |||
| + | |||
| + | |||
| + | *'''PSTN''' : Select this option to choose one of the following telephone line connection types: | ||
| + | |||
| + | [[File:New_Account3_PanelDetails_PSTN.png|thumb|PSTN Settings Example]] | ||
| + | **Select '''PSTN''' from the drop down list for a connection initiated from the software. Enter the telephone number for the phone line connected to the alarm system. Ensure that any long distance dialing string or area code information is inserted if needed. | ||
| + | |||
| + | |||
| + | |||
| + | |||
| + | |||
| + | |||
| + | |||
| + | |||
| + | |||
| + | |||
| + | |||
| + | [[File:New_Account3_PanelDetails_PSTN_Incoming.png|thumb|PSTN (Incoming) Settings Example]] | ||
| + | **Select '''PSTN (Incoming)''' from the drop down list to establish a connection manually from the alarm system's keypad. | ||
| + | |||
| + | |||
| + | |||
| + | |||
| + | |||
| + | |||
| + | |||
| + | |||
| + | |||
| + | |||
| + | |||
| + | |||
| + | |||
| + | |||
| + | *'''IP''' : Select this option to choose one of the following Internet connection types: | ||
| + | [[File:New_Account3_PanelDetails_IP.png|thumb|IP Settings Example]] | ||
| + | **Select '''IP''' in the drop down list for an IP connection established from the DLS Web SA software. Enter the IP address of the IP module connected to the alarm system (''if connecting from the same network'') or the Public (WAN) IP address of the internet connection that the alarm system is connected to for a connection remotely over the internet. | ||
| + | |||
| + | |||
| + | |||
| + | |||
| + | |||
| + | |||
| + | |||
| + | |||
| + | [[File:New_Account3_PanelDetails_IP_Incoming.png|thumb|IP (Incoming) Settings Example]] | ||
| + | **Select '''IP (Incoming)''' in the drop down list for an IP connection established from the alarm system. | ||
| + | |||
| + | |||
| + | |||
| + | |||
| + | |||
| + | |||
| + | |||
| + | |||
| + | |||
| + | |||
| + | |||
| + | |||
| + | [[File:New_Account3_PanelDetails_PCLink.png|thumb|PC Link Settings Example]] | ||
| + | *'''PC Link''' : Select this option to establish a direct connection with the alarm system using a PC Link direct connect cable. Select the COM port used for the serial or usb connection. | ||
| + | |||
| + | |||
| + | |||
| + | |||
| + | |||
| + | |||
| + | |||
| + | |||
| + | |||
| + | |||
| + | |||
| + | |||
| + | [[File:New_Account3_PanelDetails_SMS.png|thumb|SMS Settings Example]] | ||
| + | *'''SMS''' : Select this option if you are going to establish a connection to the alarm system using a GSM cellular communicator. The sim card number and authentication key are required in order to establish a connection. | ||
Latest revision as of 17:21, 30 April 2014
Create an Account
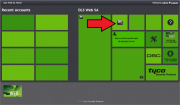
To create an account, click on the Add Account button on the home page.
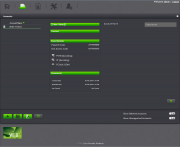
The Account page will open and you will be able to fill in all the account information such as the account name, contact information, panel information and any additional comments that you wish to add.
Panel Details
The Panel details section allows you to enter the necessary information regarding the alarm system such as:
- DLS Access Code : The DLS Access Code is always required in order to establish a connection with the alarm system. The DLS Access Code programmed by the installer in the alarm system must match the DLS Access Code typed here.
- Panel ID Code : The Panel ID Code is only required if you are having the alarm system establish the connection with the DLS Web SA software manually. To establish a connection via the alarm system keypad, press [*][6][Master Code][6]
Note: This feature must be enabled by the installer on the alarm system in order to manually establish the connection from the keypad.
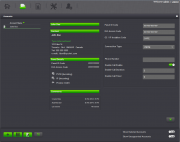
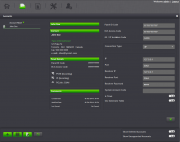
- PSTN : Select this option to choose one of the following telephone line connection types:
- Select PSTN from the drop down list for a connection initiated from the software. Enter the telephone number for the phone line connected to the alarm system. Ensure that any long distance dialing string or area code information is inserted if needed.
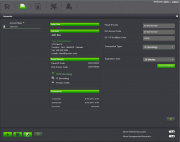
- Select PSTN (Incoming) from the drop down list to establish a connection manually from the alarm system's keypad.
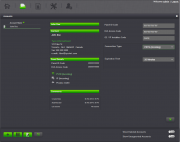
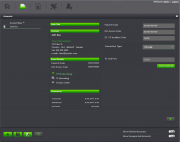
- IP : Select this option to choose one of the following Internet connection types:
- Select IP in the drop down list for an IP connection established from the DLS Web SA software. Enter the IP address of the IP module connected to the alarm system (if connecting from the same network) or the Public (WAN) IP address of the internet connection that the alarm system is connected to for a connection remotely over the internet.
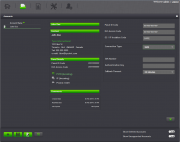
- Select IP (Incoming) in the drop down list for an IP connection established from the alarm system.
- PC Link : Select this option to establish a direct connection with the alarm system using a PC Link direct connect cable. Select the COM port used for the serial or usb connection.
- SMS : Select this option if you are going to establish a connection to the alarm system using a GSM cellular communicator. The sim card number and authentication key are required in order to establish a connection.
