Difference between revisions of "Connecting to the Alarm Panel"
(Created page with "==Connecting To The Alarm Panel== ===PC-Link=== *Required Information -Panel ID Code -DLS Access Code -PC-Link Port (Assigned under Administrator Tools – Connection Settin...") |
|||
| (4 intermediate revisions by one user not shown) | |||
| Line 1: | Line 1: | ||
| + | [[category:Tutorials]] | ||
| + | |||
==Connecting To The Alarm Panel== | ==Connecting To The Alarm Panel== | ||
===PC-Link=== | ===PC-Link=== | ||
| + | [[File:connectionpclink.png|thumb|pc link settings]] | ||
*Required Information | *Required Information | ||
| Line 9: | Line 12: | ||
When you choose PC-Link for the connection type you will be prompted to enter the Panel ID code, DLS Access code and chose which Com port that you have the PC-Link cable connected to (Under Administrator tools). After entering all information you would then want to save the changes to the account. Immediately following DLS Web SA will try to start to connect to the panel. At this point you would want to prep the panel for the PC-Link connection by going into programming on the keypad and entering section 499, enter the installer’s code and then 499 again. This will prep the panel for this connection and attempt to connect. | When you choose PC-Link for the connection type you will be prompted to enter the Panel ID code, DLS Access code and chose which Com port that you have the PC-Link cable connected to (Under Administrator tools). After entering all information you would then want to save the changes to the account. Immediately following DLS Web SA will try to start to connect to the panel. At this point you would want to prep the panel for the PC-Link connection by going into programming on the keypad and entering section 499, enter the installer’s code and then 499 again. This will prep the panel for this connection and attempt to connect. | ||
| − | |||
| − | |||
| − | |||
| − | |||
===PSTN=== | ===PSTN=== | ||
| − | + | [[File:connectionpstn.png|thumb|pstn settings]] | |
*Required Information: | *Required Information: | ||
-Telephone number | -Telephone number | ||
| Line 24: | Line 23: | ||
Once all information has been entered and you choose to save the account, the software will automatically try to connect to the panel using the information provided. | Once all information has been entered and you choose to save the account, the software will automatically try to connect to the panel using the information provided. | ||
| + | |||
| + | |||
| Line 31: | Line 32: | ||
===Incoming PSTN=== | ===Incoming PSTN=== | ||
| − | + | [[File:connectionincomingpstn.png|thumb|incoming pstn settings]] | |
*Information required: | *Information required: | ||
-Panel ID Code | -Panel ID Code | ||
| Line 38: | Line 39: | ||
After populating all required fields save the account, this will start the time the software will wait in what was programmed under the Expiration time. | After populating all required fields save the account, this will start the time the software will wait in what was programmed under the Expiration time. | ||
| − | |||
| Line 45: | Line 45: | ||
===IP=== | ===IP=== | ||
| − | + | [[File:connectionip.png|thumb|ip settings]] | |
*Required Information: | *Required Information: | ||
| Line 60: | Line 60: | ||
| − | |||
| + | |||
| + | ===Incoming IP=== | ||
| + | [[File:connectionincomingip.png|thumb|incoming ip settings]] | ||
*Required Information | *Required Information | ||
-Panel ID Code | -Panel ID Code | ||
Latest revision as of 17:22, 30 April 2014
Contents
Connecting To The Alarm Panel
PC-Link
- Required Information
-Panel ID Code -DLS Access Code -PC-Link Port (Assigned under Administrator Tools – Connection Settings)
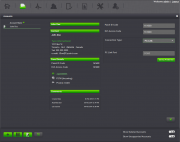
When you choose PC-Link for the connection type you will be prompted to enter the Panel ID code, DLS Access code and chose which Com port that you have the PC-Link cable connected to (Under Administrator tools). After entering all information you would then want to save the changes to the account. Immediately following DLS Web SA will try to start to connect to the panel. At this point you would want to prep the panel for the PC-Link connection by going into programming on the keypad and entering section 499, enter the installer’s code and then 499 again. This will prep the panel for this connection and attempt to connect.
PSTN
- Required Information:
-Telephone number -Panel ID Code -DLS Access code
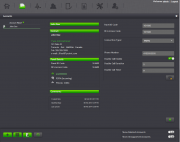
Once all information has been entered and you choose to save the account, the software will automatically try to connect to the panel using the information provided.
Incoming PSTN
- Information required:
-Panel ID Code -DLS Access code -Expiration Time
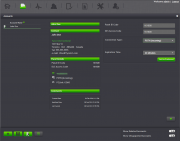
After populating all required fields save the account, this will start the time the software will wait in what was programmed under the Expiration time.
IP
- Required Information:
-Panel ID Code -DLS Access Code -GS/IP Installers Code -Expiration time
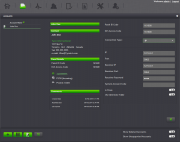
After populating all required fields save the account, the software will attempt to connect to the panel.
Incoming IP
- Required Information
-Panel ID Code -DLS Access Code -GS/IP Installers Code -Expiration time
After populating all required fields save the account, this will start the time the software will wait in what was programmed under the Expiration time.
